Setting Up Vim
Vim needs no introduction.⌗
Well that’s not entirely true, it probably does if you have never heard of it.
vim or Vi IMproved, is a well known port of the vi editor created by Bill
Joy, that was created by Bram Moolenaar. vim was designed as a more improved
text editor over the original vi, with a heavy influence on the use of the
keyboard over the mouse, and pre-installed movement commands, or custom macros,
to traverse the document you are creating or editing. For more detailed
information, including the history of Vim, please go to the home page at vim.org/
Installing Vim⌗
As I use Linux, I will mainly work on installing Vim on Arch. To install vim consult your Linux distributions wiki, or the Vim website for other ways to install vim. A few of the popular ways are below:
For Arch based systems:
$ sudo pacman -S vim
For Unbuntu based systems:
$ sudo apt install vim
For Debian based systems:
$ apt-get install vim
Basic layout⌗
When you first start vim via $ vim you are greeted with the following screen:

Pretty simple design and can get you buy if your need to edit some files, but i’m going to edit it up a little and make it cleaner, and nicer to use a little later. But first lets go though some of the most basic commands that should be learned.
One of the best things to do if you have never used vim before is to run $ vimtutor in your preferred terminal. This is a very nice introduction to the
standard movements utilized in Vim. A few of the really important ones are:
-
The hjkl keys - this is the standard movement keys for getting around in the file you are using.
hmoves left,jmoves down,kmoves up,lmoves right. -
Exiting - use
:qto exit,:q!to force a quit, and:wqto write the file and exit vim. -
When in normal mode (the standard) mode, you can utilize a number in front of the action you would like to do, such as
2jmoves 2 down,32kmoves 32 characters up, etc. This can also be utilized for other commands. -
In normal mode the
xbutton will delete a single character at the cursor,dwwill delete from the cursor to the end of the word, including the space,d$from the cursor to the end of the line,ddto delete a whole line. -
What about if you did something and want to undo it? simply pressing
uin normal mode will do that for you. -
What about if you want to just update a word:
cwand type the correct word then press<ESC>. -
Pressing
iwill put you into INSERT mode.
These are just some of the basic commands that can be handled from within vim,
vimtutor as well as the documentation can aid you in learning and figuring out
other macros and commands.
Setting up customization.⌗
Vim utilizes a configuration file, the vimrc. This vimrc can be utilized
globally, or at a user level by utilizing a .vimrc file in your home
directory.
Here you can choose which settings you would like to add. A few of the options I utilize are below:
"set line numbers to both relative and number.
set number relativenumber

"set file stats
set ruler

" spacing and whitespace things
set wrap
set textwidth=79
set tabstop=4
set shiftwidth=4
set softtabstop=4
set autoindent
set nofoldenable
You can also set custom key macros as well. A few of the ones that are useful to me are:
" set jk to esc
inoremap jk <esc>
vnoremap jk <esc>

"disable arrow keys
map <up> <nop>
map <down> <nop>
map <left> <nop>
map <right> <nop>

" Auto Close tags. Adds the start and close tags and centers the cursor in the
" center.
inoremap ( ()<Left>
inoremap { {}<Left>
inoremap [ []<Left>
Then you can utilize Plugins to get other features. I use a program called Vundle to install plugins. To install Vundle follow the README found on the github, thtough that link.
Some of the plugins I utilize are
- NERDtree - A custom file system explorer for Vim. Need to also use (Vim-devicons){https://github.com/ryanoasis/vim-devicons} to get working file system icons.
- Onedark - A Dark colorscheme for Vim/Neovim. Sometimes I use (Gruvbox)[https://github.com/morhetz/gruvbox].
- vimrainbow - Colorizes your paranthesis, brackets, and squierlies to make them easier to distinguish.
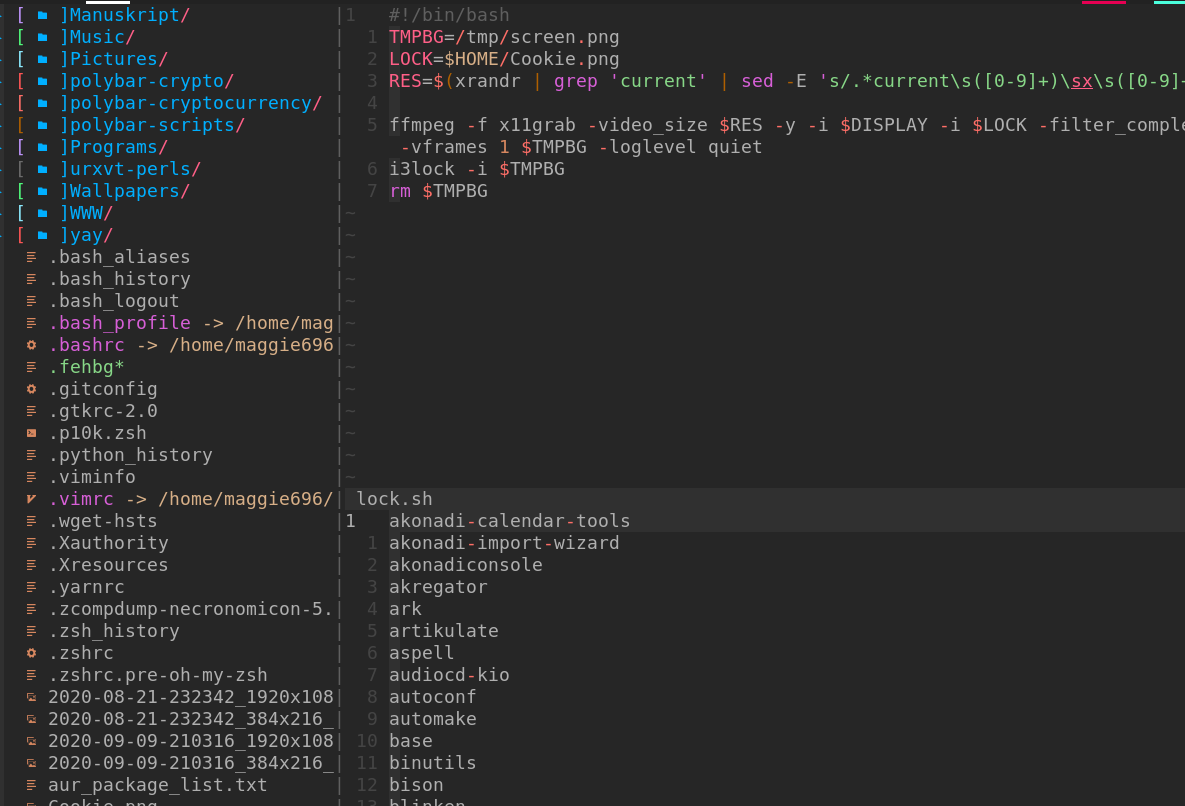
These are just a few of the plugins I utilize. After installing and setting everything up my vim now looks like below:
$ sudo exit⌗
This was a VERY simple introduction to vim. There are a plethora of resources online for learning how to utilize, configure and customize vim. a few suggestions that i have used are :
- The vim documentation.
- the following youtubers / channels: Luke Smith, ThePrimeagen, and Thoughtbot
- VIM Adventures - a really fun interactive game, created to easily teach vim movements, while playing an RPG style game.
If you would like to see my vimrc and other dotfiles please feel free to go to my Github. I need to update my README, but the files are all there!
I hope you enjoy the wonderful and majestic world that is vim!